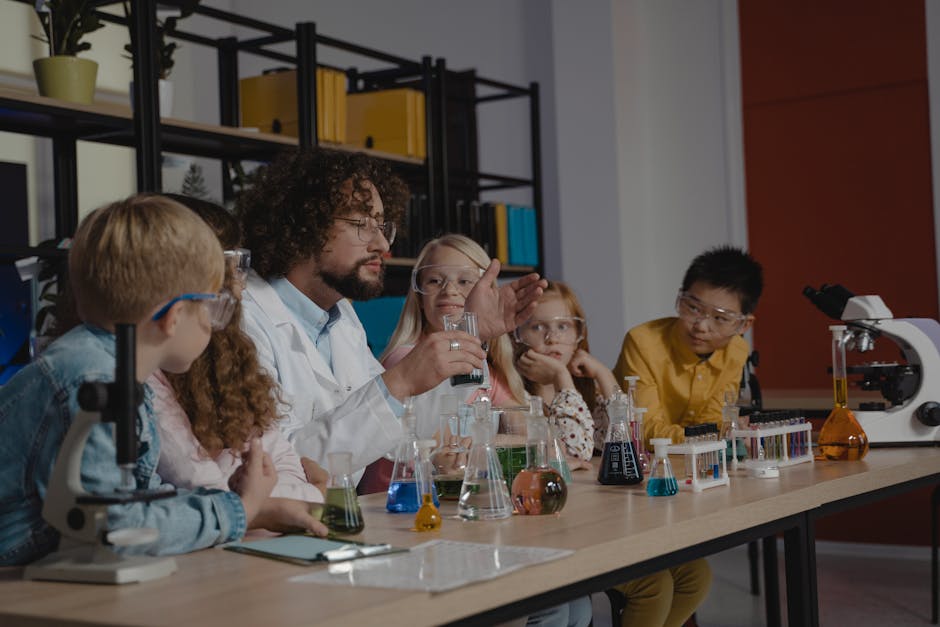
Why Science at Home Matters
If you want your kids to think for themselves, science is one of the best tools you’ve got. It teaches them to ask questions, test ideas, and see mistakes as part of the process—not something to avoid. That kind of thinking starts early, and doing hands-on experiments at home builds the habit.
Real learning doesn’t come from passively watching videos. It comes from getting your hands dirty—mixing, building, tweaking, and observing. Home science projects shift your child from being a viewer to becoming a do-er. Suddenly, baking soda and vinegar aren’t just kitchen items. They’re a chemical reaction waiting to happen.
And maybe the best part? You’re not just teaching them science. You’re spending time together. You’re laughing over messes, asking questions side by side, maybe even learning something new yourself. These aren’t just experiments—they’re memories.
Safety First
Science at home can be fun—but only if everyone stays safe. Ground rules help keep things mess-free, stress-free, and injury-free. Start here:
- Always clear a workspace before you begin.
- Read through the full experiment before starting.
- Keep all ingredients and tools in one spot so you’re not scrambling mid-project.
- Wash hands before and after. Safety goggles are a smart add-on for any splashy or fizzy experiment.
- One experiment at a time. No mixing projects—things get wild fast.
Household Items to Use with Caution
Most of these projects use basic stuff from your kitchen or garage—but not all of it is kid-safe unattended. Here’s what to double-check:
- Vinegar and baking soda: harmless alone, but emit gas under pressure (watch bottle builds).
- Borax: useful for slime, but keep away from mouths and wash hands well afterward.
- Rubbing alcohol and hydrogen peroxide: flammable and toxic if swallowed.
- Heat sources: Lamps, irons, and stoves should never be handled by younger kids without help.
Supervision Guidelines by Age
Your child’s age matters when deciding how hands-on you need to be. As a rough breakdown:
- Ages 3–5: Hands-on help every step—this is full teamwork mode.
- Ages 6–9: You guide, they try—with you close by to step in.
- Ages 10–12: Start shifting the lead to them, watch from a distance, check over the setup.
- Ages 13+: Let them take charge but ask for a quick run-through before they dive in.
Bottom line: stay present, stay calm, and let science be the safe kind of surprising.
Experiment 1: Homemade Volcano
There’s a reason this classic experiment never goes out of style—it’s the perfect mix of science and a little harmless mess. The reaction between baking soda and vinegar is a straightforward acid-base reaction that creates carbon dioxide gas, which causes the fizzing eruption. It’s simple chemistry with instant wow factor—and easy enough for younger kids to join in.
What You’ll Need:
- Baking soda (about 2-3 tablespoons)
- Vinegar (half a cup)
- Dish soap (a big squirt)
- Food coloring (red or orange for lava look)
- Empty plastic bottle
- Tray or pan to catch overflow (trust us)
Step-by-Step:
- Place the plastic bottle in the center of the tray.
- Add baking soda to the bottle using a funnel or spoon.
- Squeeze in a good squirt of dish soap.
- Add a few drops of food coloring for flair.
- When ready, pour in the vinegar and step back.
- Watch the eruption take off. It bubbles, fizzes, and flows just like lava—almost.
Want to Go Bigger? Build a Volcano:
Wrap the bottle in papier-mâché or mold clay around it to create your own mountain. Let kids paint it once dry. Now your volcano has a home. Just leave the top open so you can still add ingredients—and trigger the action.
This is chemistry you can see, touch, and laugh about. Perfect kickoff for a science day at home.
Experiment 2: Invisible Ink Messages
This one feels like magic, but it’s grounded in simple science. Invisible ink teaches kids about acid-base reactions and oxidation—in other words, how certain substances change when exposed to heat or air over time.
Start with the basics: all you need is lemon juice, a cotton swab, a blank sheet of paper, and a heat source like a lamp or clothes iron. Use the cotton swab to write a message or draw a picture with lemon juice. Once it dries, the paper will look blank. But apply gentle heat and the message appears as if by sorcery. What’s happening? The acid in the lemon juice weakens the paper. When heated, those spots darken faster than the rest of the sheet.
It’s safe, easy, and full of storytelling potential. Turn it into a treasure hunt with hidden clues, or stage a spy mission complete with secret dossiers. Kids love the big reveal—and they’re learning chemistry while they play.
Experiment 3: Rainbow in a Jar
What it teaches: This one hits the sweet spot between art and science. It’s all about liquid density—why some liquids float on others instead of mixing together. Pretty to look at, and surprisingly educational.
Materials:
- Honey
- Dish soap
- Water (mix with food coloring for visibility)
- Vegetable oil
- Rubbing alcohol (also with food coloring)
- A tall, clear glass or jar
- A spoon (if needed) and a steady hand
Instructions: Pour each liquid slowly, starting with the densest. Go in this order: honey, dish soap, colored water, oil, and finish with colored rubbing alcohol. The trick is pouring slowly and down the side of the jar or over the back of a spoon. Rushing it? You risk mixing the layers.
Science Breakdown: Each liquid has a different density—a fancy way of saying some matter weighs more in the same amount of space. Honey sinks like a rock because it’s packed with molecules. Alcohol, on the other hand, is light and airy by comparison. The layers don’t mix because the molecules in each liquid interact differently. Water and oil, for example, don’t “like” each other. Think of them as neighbors who keep to themselves.
This experiment is simple but powerful. You’re showing your kids how invisible forces—like molecular weight—create visible results. Plus, it looks cool on a shelf while it lasts.
Experiment 4: DIY Magnetic Slime
This one’s a crowd-pleaser. Magnetic slime is a strange little science miracle—it teaches kids about both magnetism and basic chemistry. It looks like regular slime at first, but hold a strong magnet nearby and the goo starts to crawl, twitch, and rise like it’s alive. That’s magnetic fields in action.
What You’ll Need:
- White school glue (about ½ cup)
- Iron filings or magnetic powder (available online or at some craft stores)
- Borax (1 teaspoon dissolved in ½ cup warm water)
- Another ½ cup of regular water
- A strong rare-earth magnet (don’t bother with a fridge magnet, it’s too weak)
- Disposable gloves and a bowl for mixing
How to Make It:
- In a mixing bowl, combine the glue and water. Stir until smooth.
- Add a spoonful of iron filings or magnetic powder and mix well.
- Slowly add the borax solution, a little at a time, stirring as it thickens. It should start clumping quickly into slime.
- When it gets hard to stir, reach in and knead it with your hands (wear gloves—the iron powder can stain).
- Once it’s stretchy and no longer sticky, test it out by bringing the magnet close. Try moving the magnet under the table or behind glass for different effects.
Safety Tips:
- Don’t let kids put the slime near their eyes or mouths.
- Wash hands thoroughly after playing.
- Store the slime in an airtight container (and label it—this isn’t snack material).
Real Talk:
This experiment is a bit messy—iron powder gets everywhere if you’re not mindful. But that’s part of the fun. Just set some newspaper down and lean into it. Kids get to see science in motion, literally. It’s weird, it’s cool, and it won’t be forgotten anytime soon.
Experiment 5: Balloon-Powered Car
This one’s a hit with kids and grown-ups alike—and it’s more than just fun. The balloon-powered car is a hands-on way to explore air pressure, motion, and the basics of Newton’s Laws.
What It Teaches: When the balloon deflates, air rushes out, pushing the car forward. That’s Newton’s Third Law in action: for every action, there’s an equal and opposite reaction. It’s a simple but powerful example of how forces work.
Materials:
- 1 balloon (round or long balloons work)
- 2 straws (1 for the balloon nozzle, 1 for the axle)
- Tape
- Cardboard or LEGO wheels (you can get creative here—bottle caps also work)
- Optional: skewers or thin rods for the axle
Build Instructions:
- Attach the balloon to a straw using tape—make sure it’s sealed tight so no air leaks out.
- Tape the balloon-and-straw setup to a lightweight body—cardboard works great.
- Create axles using a second straw and wheels. Wheels should spin freely for best results.
- Blow into the straw to inflate the balloon. Hold the end shut with your fingers.
- Place the car on a flat surface, release, and watch it speed off.
Tweak for Speed: Try different balloon sizes. Test various body shapes. Explore wheel materials. Keep tweaking and testing. Ask the kids: What makes it go farther? Faster?
Explaining the Physics in Kid Terms: “When you let go of the balloon, the air pushes out the back. That push sends the car forward. It’s like how a rocket works. Same idea—just with less fire.”
Let them experiment, crash it into a wall or two, and most importantly—ask questions. It’s science with motion, noise, and laughs.
Keep the Curiosity Going
The best science lessons often start with a simple question: “What if?” What if we mix these two things? What if we build this differently? What if the balloon had wings? Kids have no shortage of questions—they just need permission to explore them. So encourage those “what if” moments. Let their questions guide the next mini-experiment.
Make the learning last by documenting what happens. Keep it low-pressure. A science journal, a sketchpad filled with diagrams, or even short video clips on a tablet—whatever works. It’s not about perfect notes, it’s about tracking curiosity as it evolves.
And don’t stop at pipettes and slime. Mix in creative play. Turn experiments into art projects or story starters. Use crafts to go deeper—build cardboard prototypes, create color-coded charts, or sketch scenes from a science story. Check out Creative Arts and Crafts Ideas for Learning for crossover inspiration. Science is more fun—and more memorable—when their hands and imaginations are both in the game.
Final Tips
Let go of perfection. Some experiments won’t go as planned—and that’s fine. Science is messy. The baking soda might not fizz as much, the slime might come out too gooey, or the balloon-powered car might veer straight into a chair leg. That’s part of the process. What matters is trying, observing, and talking about what happened.
Let your kid lead. If they get sidetracked testing five different liquids in the rainbow jar or want to mix vinegar into everything—roll with it. Curiosity is a better teacher than a script. These experiments are tools, not rules.
The gold is in the questions. After each activity, ask simple prompts: “What did you notice?” and “Why do you think that happened?” You’re not testing them—just helping them think like little scientists. Sometimes their answers are way off. Sometimes they’re spot-on. Either way, they’re learning to explore, think, and explain—and that’s the win.
Wrap-Up
Learning science at home isn’t just a fun way to spend an afternoon—it’s the groundwork for how kids understand the world. These hands-on activities spark questions, build problem-solving habits, and bring big ideas down to scale. It doesn’t require fancy setups or fancy words. Just curiosity, a few supplies, and a willingness to explore together.
Match the experiment to your kid’s age and interests. Young ones might prefer colorful reactions, while older kids enjoy building and testing results. Flex the difficulty when needed. Keep things safe and simple—there’s no need to run a lab to get real learning.
Most of all, remember that the best learning doesn’t come from perfect outcomes. It comes from trying, noticing, and asking better questions next time. You’ve got this.


 Health & Wellness Contributor